

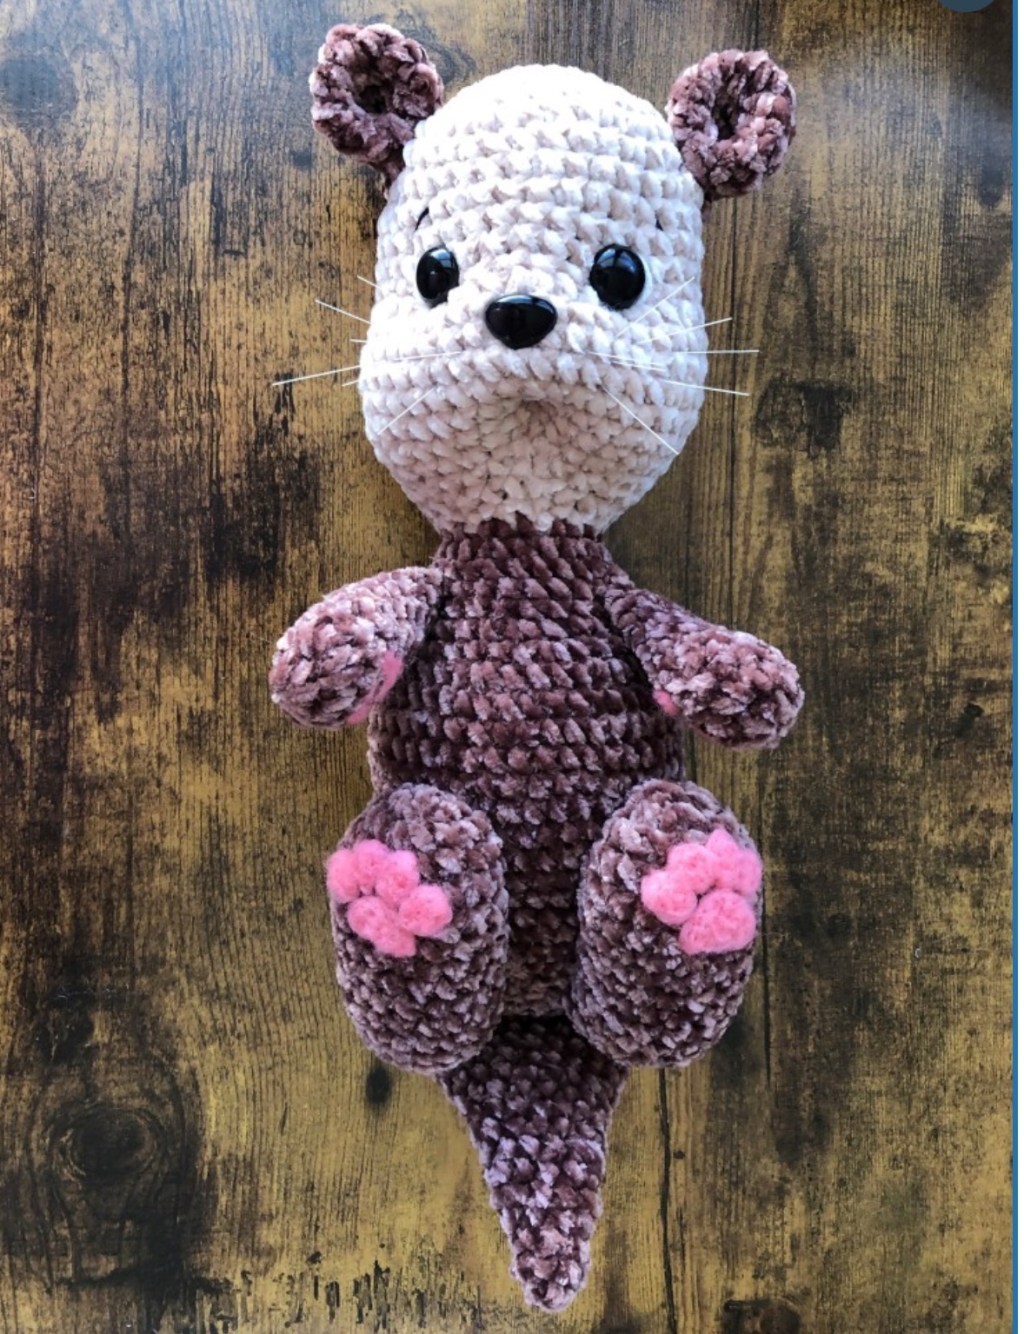
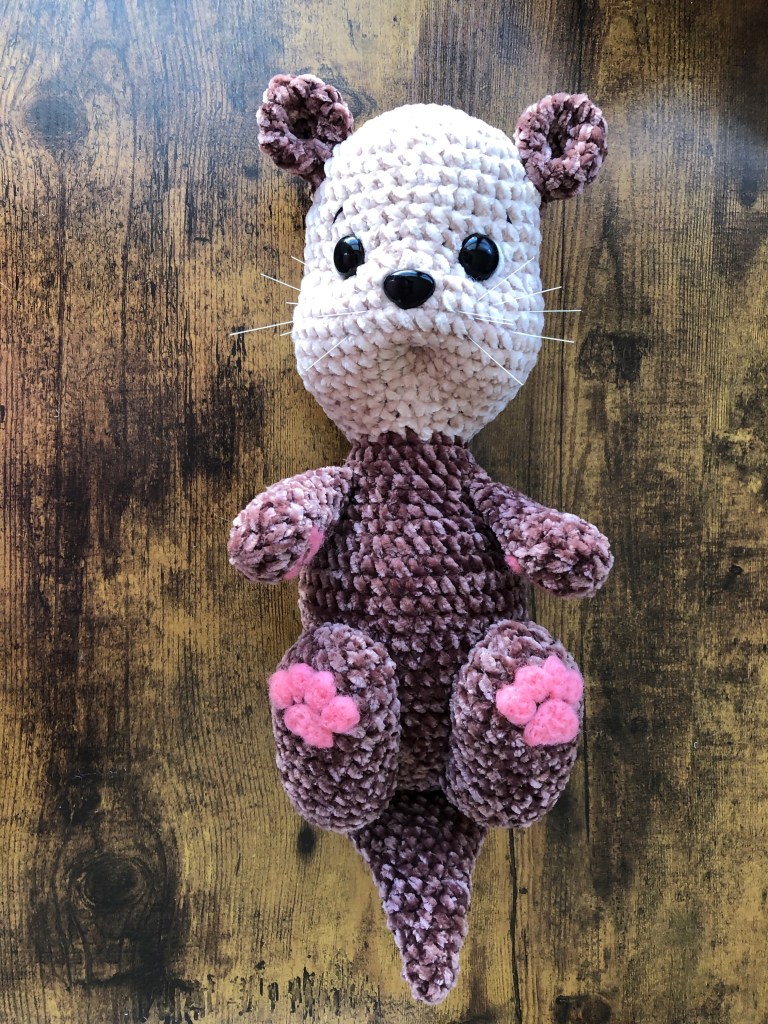
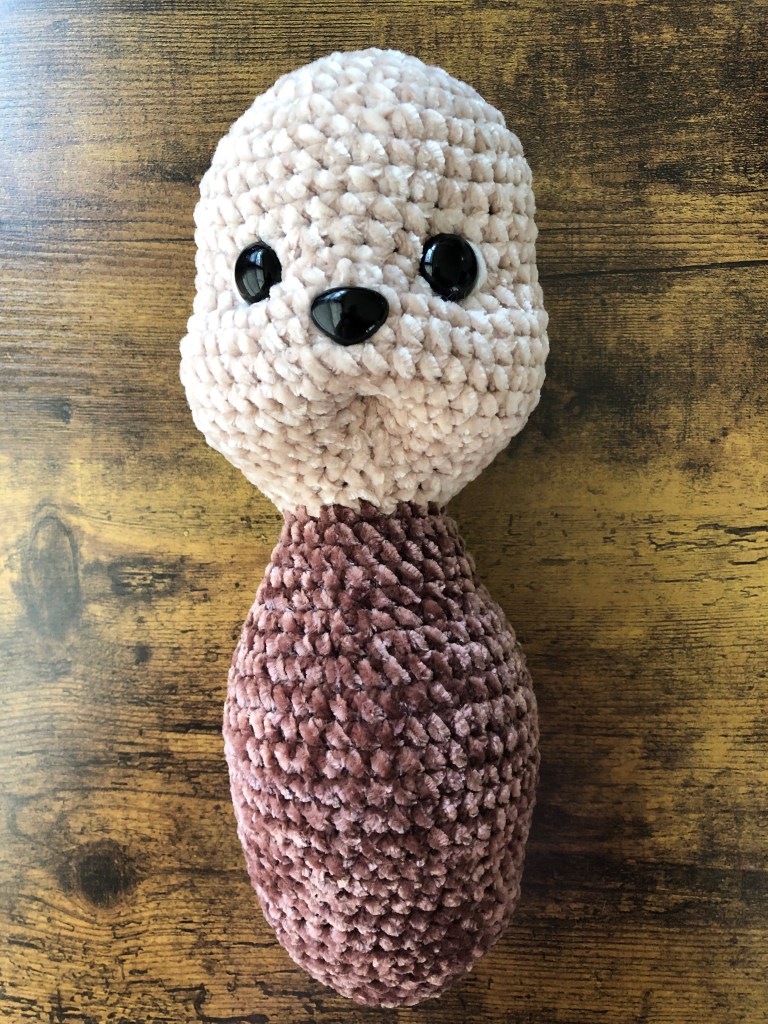
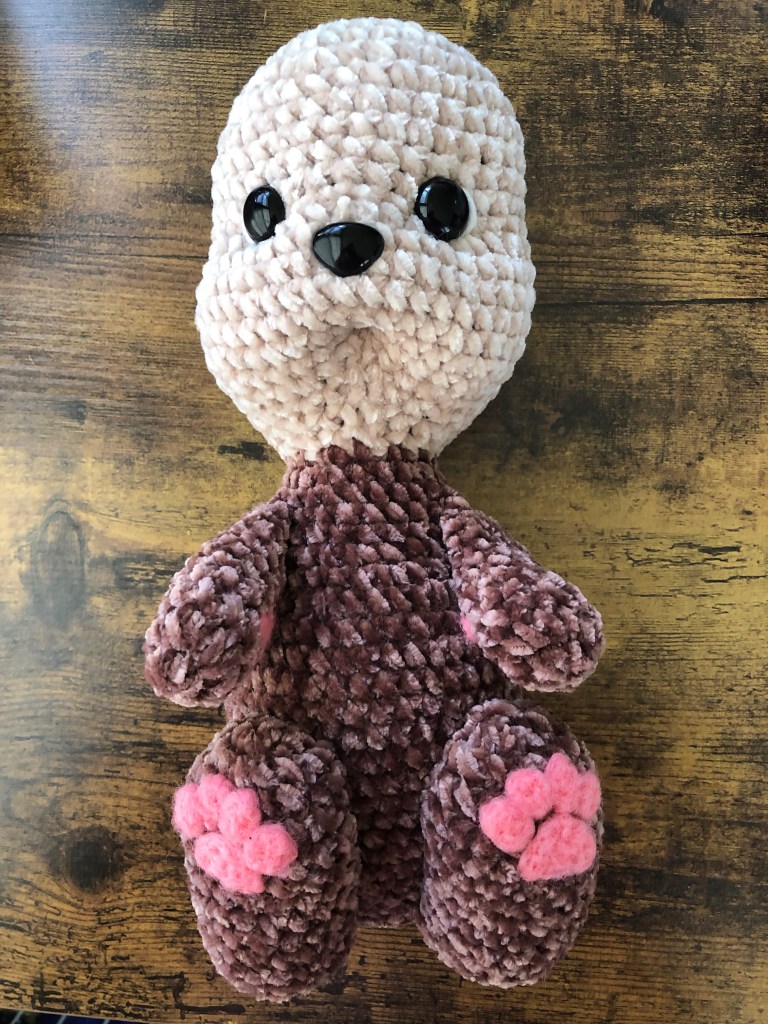
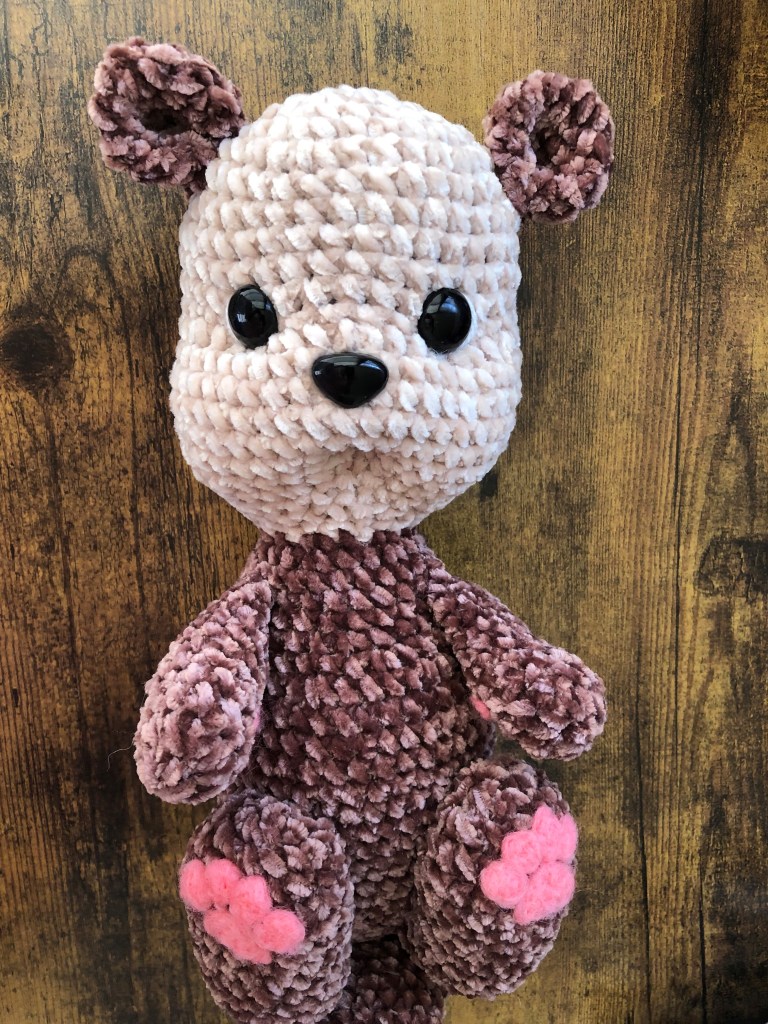
Meet Oliver the Otter-Free Crochet Pattern!
Snuggly, sweet, and full of personality, Oliver the Otter is the perfect plushie project for any animal lover! Made with chenille yarn, Oliver is irresistibly soft and works up quickly- making him a fun and satisfying make whether you are a beginner or a seasoned crocheter.
Oliver is one of my older patterns, I decided to share it for free with everyone. You can always purchase the ad free pdf option on Ravelry: https://ravel.me/oliver-the-otter
In this free pattern, you’ll get step-by-step instructions to crochet your own Oliver, complete with his round ears, tiny paws and adorable face. Whether he becomes a cuddle gift, a nursery friend or your newest market bestseller, Oliver is sure to bring smiles wherever he goes!
So grab your hook, dive into your yarn stash and lets make something otterly adorable!
NOTE: in this pattern you will need to know how to needle felt for the paws (feel free to leave it out or use embroider for the toe beans if you can’t needle felt), I will be showing you how to face sculpt his cute little face.
CopyRight:
This pattern is my creation, please do not share the
pattern with anyone, post it as free on the internet or
alternate the pattern any way. You can sell the final
product made with this pattern. Please note
CocoKnittedCreations as the designer. Happy
Crocheting!!
Materials Used:
3.5 mm hook
18 mm safety eyes x2
15mm safety nose
Stuffing
Stitch Markers
Bernat Baby Velvet in the color Chocolate
Bernat Velvet color Mushroom
Red Heart Super saver in black for details
Whiskers
Level: Beginner/Intermediate
U.S ENG Terms
MC: Magic Circle
sc: Single Crochet
R: Round
Inc: Increase
Dec: Decrease
CH: Chain
ST: Stitch
You can make Oliver the Otter in any type of yarn, the thicker the yarn the bigger your otter will be, the thinner the yarn, the smaller your otter will be. Make sure to adjust your crochet hook size with your yarn.
Head and body
With velvet mushroom
R1: MC 6sc
R2: INC x6 (12)
R3: (1sc, Inc) x6 (18)
R4: (2sc, Inc) x6 (24)
R5: (3sc, Inc) x6 (30)
R6: (4sc, Inc) x6 (36)
R7-R12: 36sc (36) (7 rounds)
R13: (Inc, 1sc) x9, 18 sc (45)
R14-R18: 45sc (45) (5 rounds)
R19: (Dec, 1sc) x9, 18sc (36)
R20: (4sc, Dec) x6, (30)
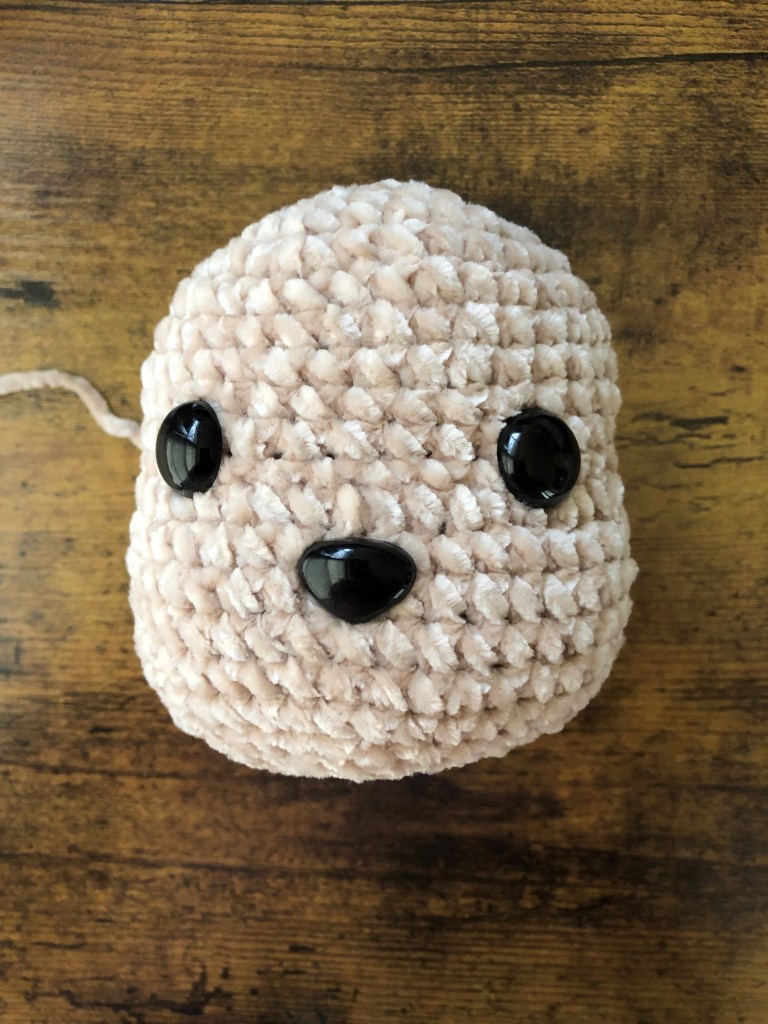
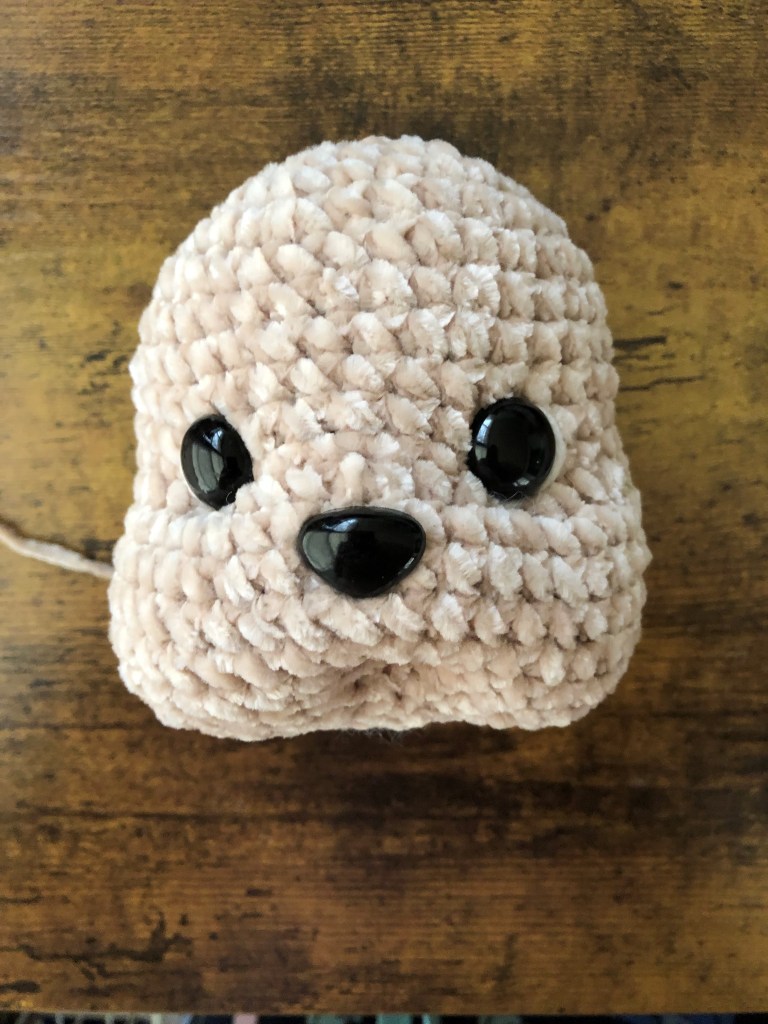
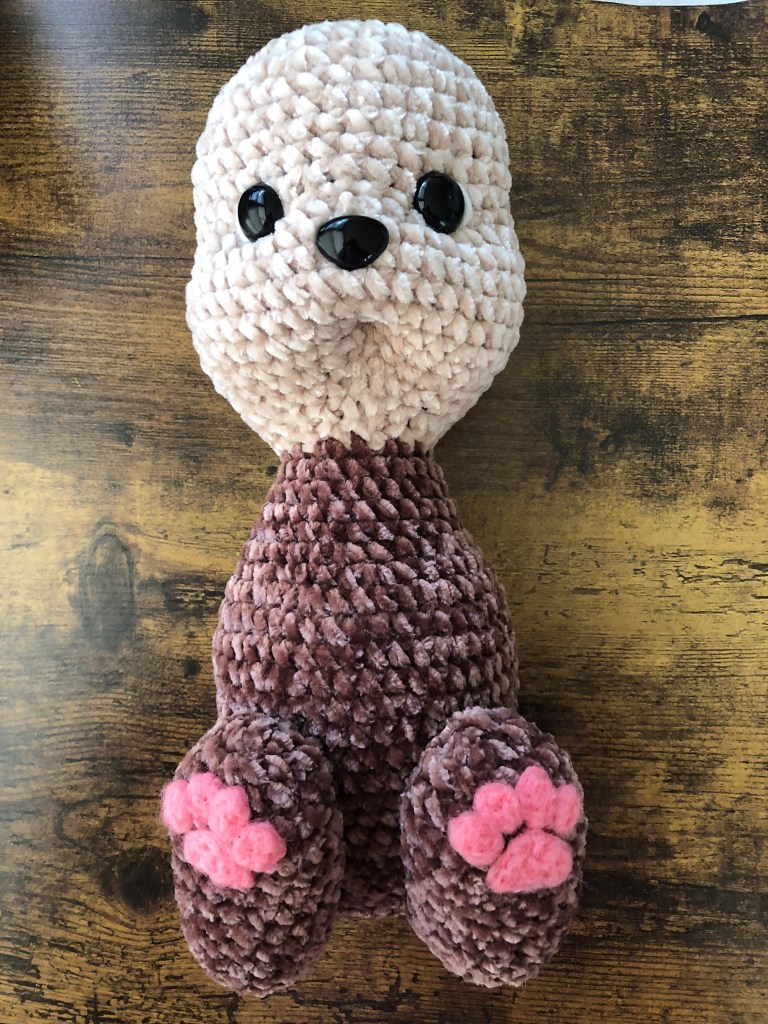
Place the eyes between row 11 and row 12 with 5 sts between the
eyes.
Stuff the head firmly and stuff the cheeks firmly.
We will Sculpt the face.
Here are some pictures to help you sink in the eyes and make the
cheeks show out more. We will add eyebrows with black thread, make
under line with white yarn around the eyes. Add the safety nose 15mm
1 row under the eyes, 1sts on each side of the eyes. See pictures.
Keep stuffing the head firmly.

R21: (3sc, Dec) x6 (24)
R22: (2sc, Dec) x6 (18)
R23: (1sc, Dec) x6 (12)
We will continue with the body. Use the velvet chocolate.
R24: (1sc, Inc) x6 (18)
R25: (2sc, Inc) x6 (24)
R26-R28: 24sc (24) (3 rounds)
Stuff the neck firmly to help hold the head up.
R29: (3sc, Inc) x6 (30)
R30: (4sc, Inc) x6 (36)
R31: (5sc, Inc) x6 (42)
R32-R38: 42sc (42) (7 rounds)
R39: (5sc, Dec) x6, (36)
R40: (4sc, Dec) x6, (30)
R41-R43: 30sc (30) (3 rounds)
R44: (3sc, Dec) x6 (24)
Stuff the body firmly
R45: (2sc, Dec) x6 (18)
R46-R47: 18sc (18) (2 rounds)
R48: (1sc, Dec) x6 (12)
R49: Dec x6 (6)
F/O, sew the hole shut and hide the tail.
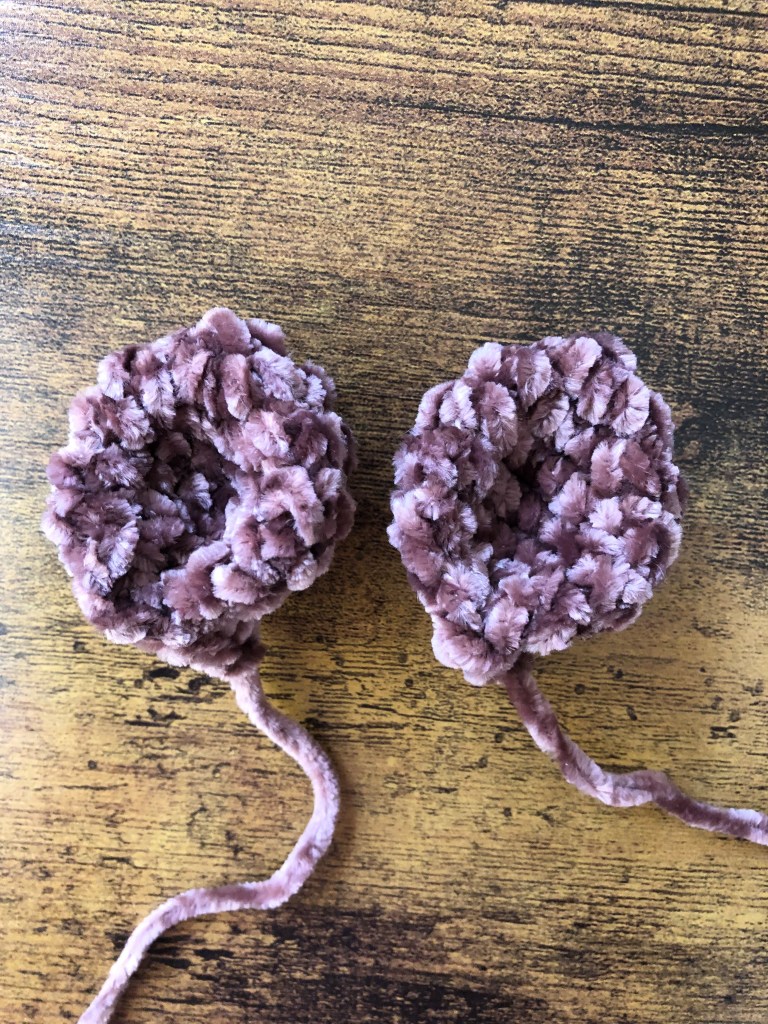
Ears x2 with Bernat Baby Velvet color Chocolate
R1: MC 6sc
R2: Inc x6 (12)
R3: (1sc, Inc) x6 (18)
R4-R5: 18sc (18) (2 rounds)
R6: (1sc, Dec) x6 (12)
Fold the ear in half, sc through both sides, it will close the ear.
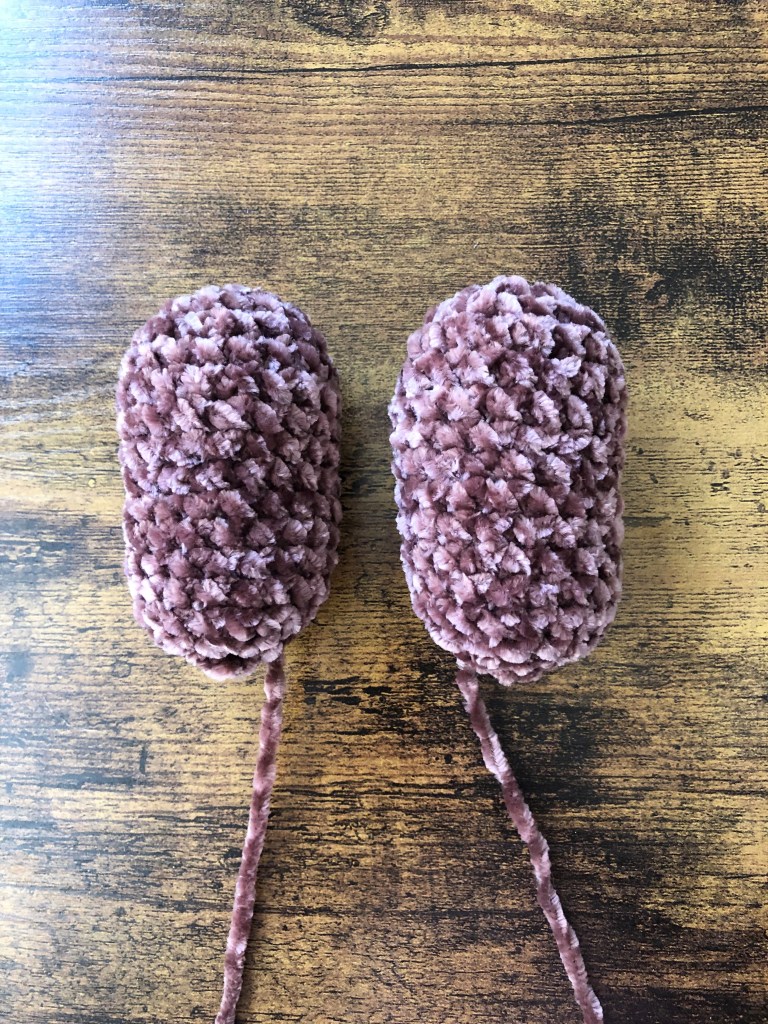
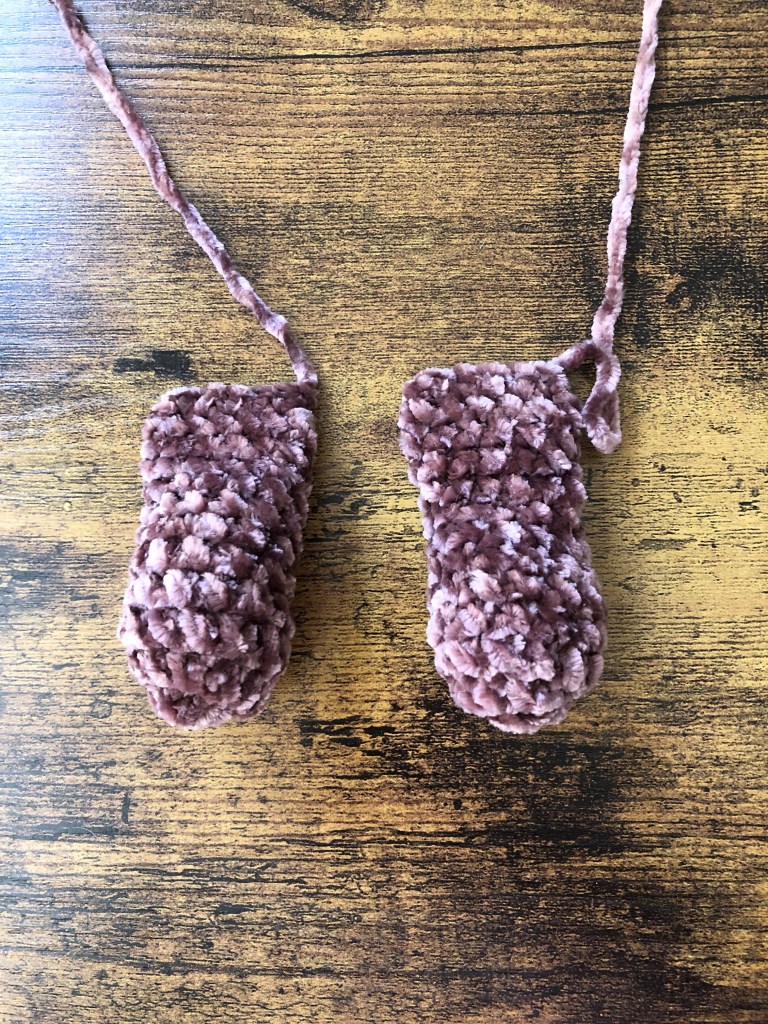
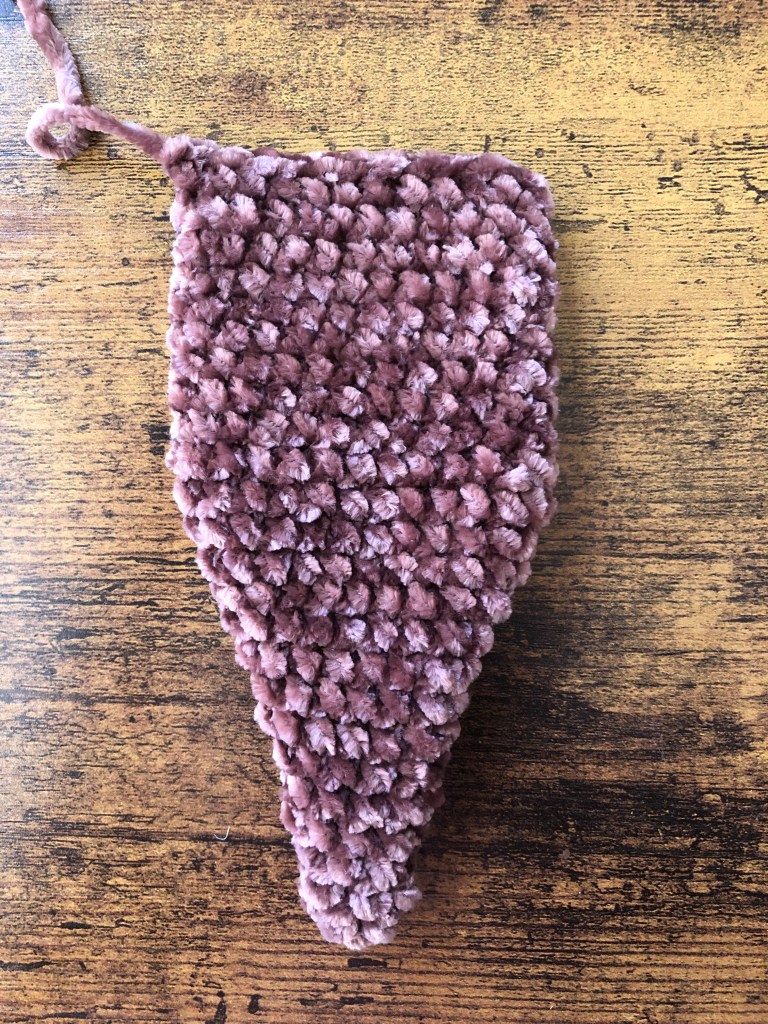
Feet x2 Bernat Baby Velvet color Chocolate
R1: MC 6sc
R2: Inc x6 (12)
R3: (1sc, Inc) x6 (18)
R4-R13: 18sc (18) (10 rounds)
Firmly stuff the tip of the foot and slightly stuff the rest of the foot
R14: (1sc, dec) x6 (12)
R15: dec x6 (6)
F/O leave a long tail for sewing.
Arms x2 Bernat Baby Velvet color Chocolate
R1: MC 6sc
R2: Inc x6 (12)
R3-R12: 12sc (12) (10 rounds)
Only stuff the hand and make sure its stuff firmly
Fold the opening close and sc the opening shut. F/O, leave a tail for sewing.
Tail Benart Baby Velvet color Chocolate
R1: MC 4sc
R2: (1sc, Inc) x2 (6)
R3: 6sc (6)
R4: (2sc Inc) x2 (8)
R5: (3sc, Inc) x2 (10)
R6: 10sc (10)
R7: (4sc, Inc) x2 (12)
R8: (5sc, Inc) x2 (14)
R9: 14sc (14)
R10: (6sc, Inc) x2 (16)
R11: (7sc, Inc) x2 (18)
R12: (8sc, Inc) x2 (20)
R13: (9sc, Inc) x2 (22)
R14: (10sc, Inc) x2 (24)
R15-R24: 24sc (24) (10 rounds)
Fold the tail and sc the opening shut. F/O, leave a tail for sewing.
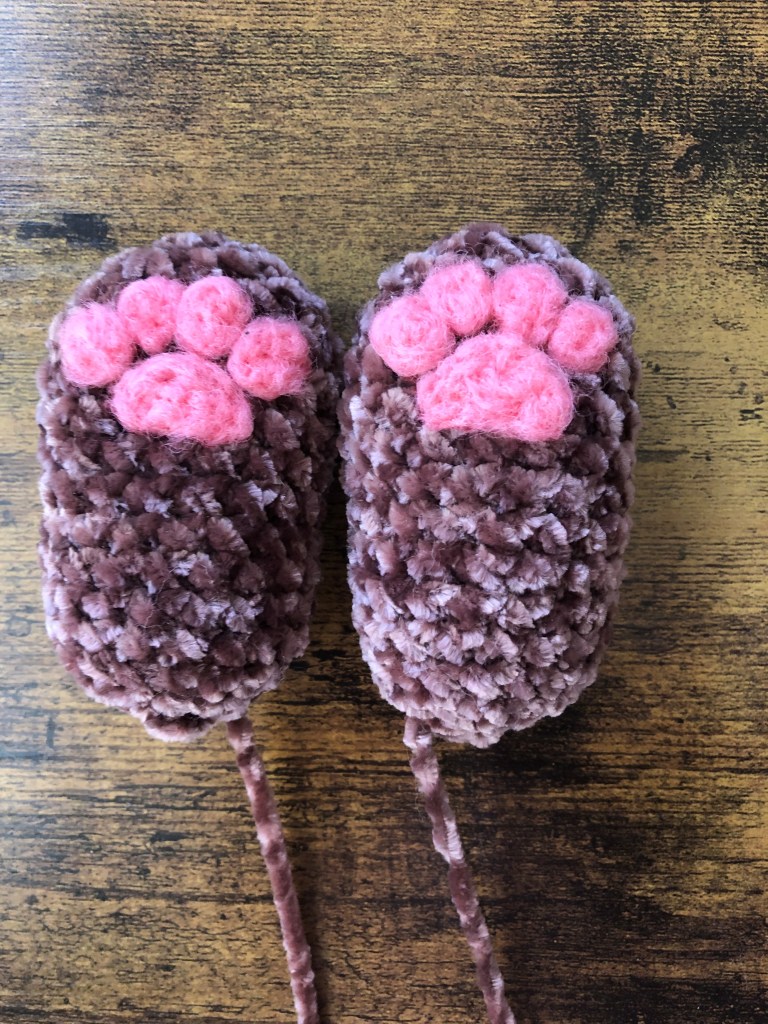
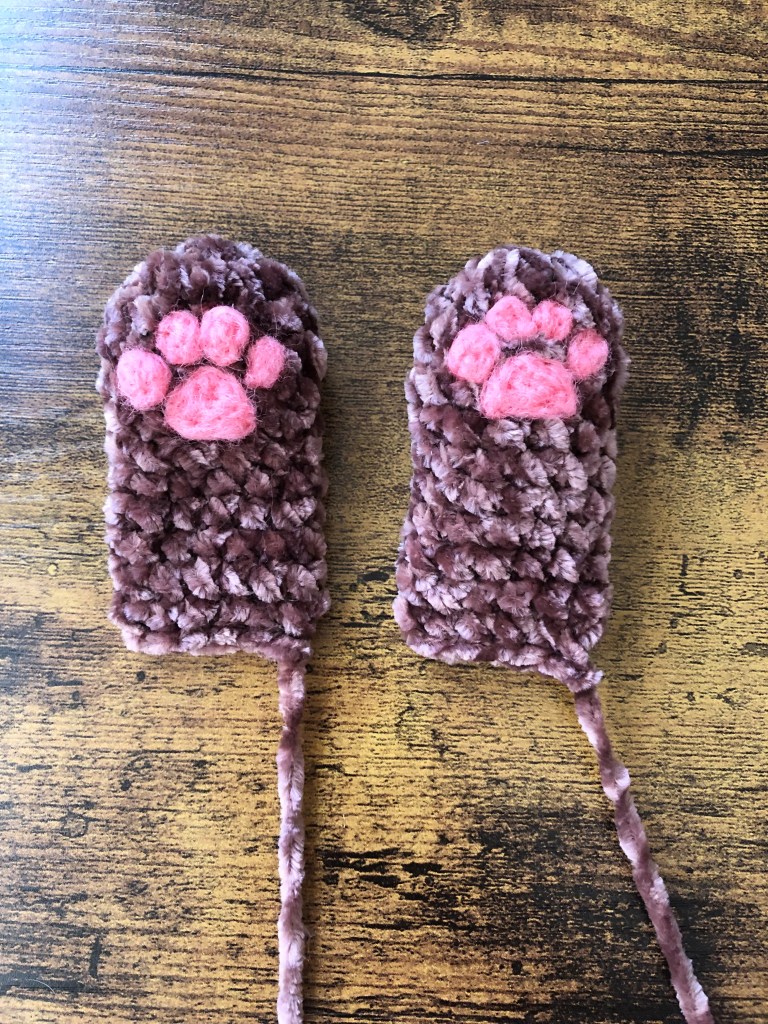
We will make the toe beans on the feet and the hands. I needle felt the toe beans as it looks more realistic, but you can crochet them by doing MC 2 for the small ones for the hands and MC 4 for the big one and MC 4 for the small toe beans for the feet and MC 6 for the big toe bean on the feet.
You can also use a long piece of yarn and a tapestry needle and embroider the beans.
Assembly:
We will sew the feet between row 45 and row 34 and 5 sts apart.
Sew the arms between row 25 and row 30, 8sts apart.
Sew the arms in an angle so the little hands are resting on the belly. Make sure to sew the hands with the toe bean facing the belly.
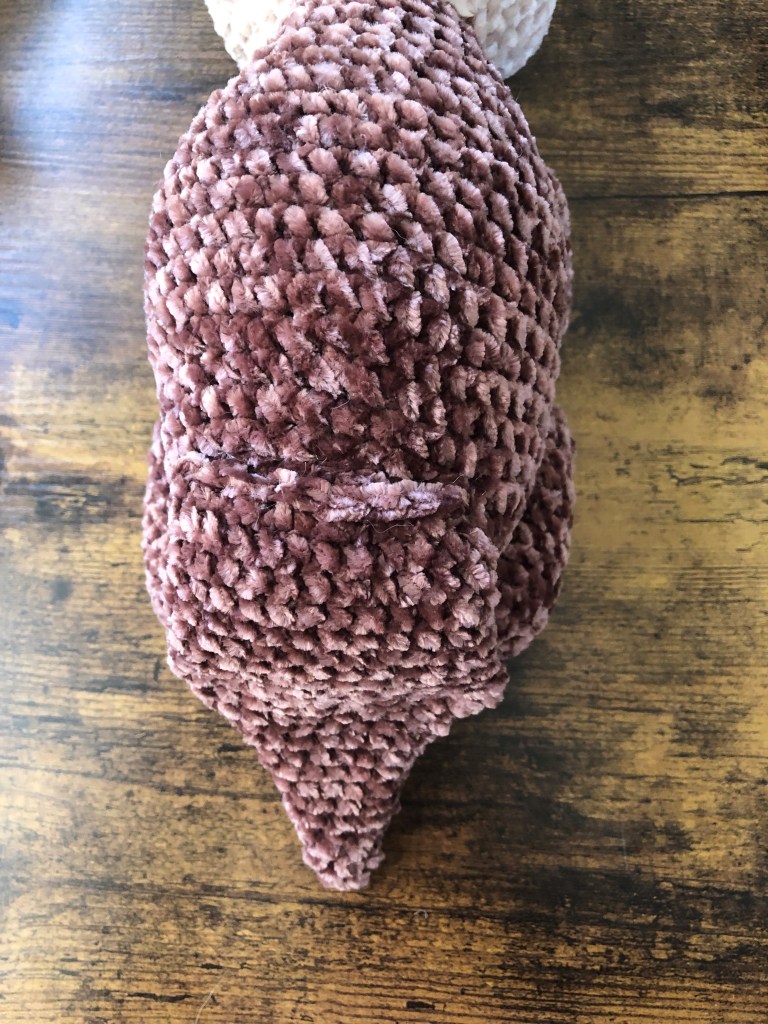
Sew the tail on row 42, make sure that the tail is centered between the feet. Sew the middle of the tail to the butt, it will keep it nice in the air when he’s laying down.
Sew the eyebrows above the eyes with black embroidery floss.
Glue in the whiskers.

You made Oliver the Otter-Yay!
I hope you had so much fun bringing Oliver to life! I’d absolutely love to see how your little otter turned out, feel free to tag me on Instagram or use the hashtag #OliverTheOtter so I can share your amazing makes.
If you enjoyed this pattern, be sure to check out my other free patterns and subscribe to my blog so you never miss a new release!
Thanks for stopping by and happy crocheting!
-Carolann Rutkowski – CocoKnittedCreations

Leave a comment